Abstract
The Arduino inbuilt 10 bit ADC, can be used for constructing / measuring the 0 Volt to 1000 Volt user selectable Digital Volt Meter. The 16x2 LCD display driver, connected with Arduino Uno will be used for displaying the measured voltage. This voltmeter can read only DC voltage.
Parts and components
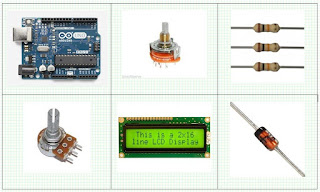
Arduino Uno board
16x2 LCD = 1 No
1K Potentiometer = 1 No
4 Way, 2 Pole Rotary switch = 1 No
Resistor 10 K = 4 Nos
Resistor 1 K = 1 No
Resistor 9 K = 1 No
Resistor 90 K = 1 No
Resistor 900 K = 1 No
IN5913B 3.3 Volt Zener diode = 1 No

The 1.1V internal reference is chosen for the ADC.
The voltage divider will, provide the input voltage between 0 to 1100mV.
Hence the software will measure and display the values between 00.00 Volt to 1000.00 Volt, in accordance with the Scale selection.
Sine 4 way 2 pole rotary switch is used, the Scale selection and voltage divider selection happens in parallel.
Initially the software will display the “DC Volt meter” for about one second.
If over voltage is fed, the software will display the over voltage indication too (> 1 mVolt, > 10 Volt, > 100 Volt, > 1000 Volt).
10 bit ADC reading is mapped to 1100 mV, which is the Vref mille volt.
Every 500 mSec the ADC is polled and displays the new reading.
gizlenmis kod


The project is successfully simulated by using the Proteus.
The measured DC voltage is displayed 16x2 LCD display.
Below illustration will demonstrate the accuracy and measured values.
The Arduino inbuilt 10 bit ADC, can be used for constructing / measuring the 0 Volt to 1000 Volt user selectable Digital Volt Meter. The 16x2 LCD display driver, connected with Arduino Uno will be used for displaying the measured voltage. This voltmeter can read only DC voltage.

Parts and components
Arduino Uno board
16x2 LCD = 1 No
1K Potentiometer = 1 No
4 Way, 2 Pole Rotary switch = 1 No
Resistor 10 K = 4 Nos
Resistor 1 K = 1 No
Resistor 9 K = 1 No
Resistor 90 K = 1 No
Resistor 900 K = 1 No
IN5913B 3.3 Volt Zener diode = 1 No
Step 1: Schematic

The 16x2 is very common type LCD, with two rows, and each row displays 16 characters of either 5x7 or 5x8 dot matrix characters.
The LCD is available in a 16 pin package. It consists of back light and contrast adjustment function and each dot matrix has 5×8 dot resolution.
The 16x2 LCD display is connected to the Arduino (13,12,11,10,9 and 8) digital IO pins, where LCD operates at 4 bit data mode.
If the display is not visible, adjust the Contrast pot (1K), to make it visible.
A Rotary switch operates by rotation of its spindle / shaft. Rotary switches are chosen when more than 2 positions are needed.
A four way, two pole rotary switch used for this design. One pole is connected to the voltage divider network and then A0 analog input pin of Arduino.
And another pole is connected to 5,4,3 and 2 Digital IO pins, used for selecting the DVM range Voltage divider circuit is used to divide voltage into two parts (measurement and drop).
Internal Vref (1100 mV) of Arduino is selected for measurement.
IN5913B 3.3 Volt Zener diode, at A0 pin, will product the Arduino, from over voltage inputs.
ADC Resolution = Vref / (1024 -1).
ADC Resolution = 1.1 V / 1023 = 1100mV / 1023 = 1.075 mV.
1000 mVolt Scale
0 to 1 Volt measurement voltage is directly fed to A0 analog input.
There is no potential divider is used for measuring the 0 to 1Volt.
If Vin is 1 Volt then Vmeasurment = 1.0 V = 1000 mV.
DVM Resolution = (1.1 / 1023) 1 Volt = 1.075 mV.
10 Volt Scale
0 to 10 Volt measurement voltage is fed to A0 analog input, through potential divider (R19 : R7) (1K and 9K).
If Vin is 10 Volt then Vmeasurment = 10 (1K / 10K) = 1000 mV.
DVM Resolution = (1.1 / 1023) 10 Volt = 10.75 mV.
100 Volt Scale
0 to 100 Volt measurement voltage is fed to A0 analog input, through potential divider (R19 : R7+R8) (1K and (9K+90K)).
If Vin is 100 Volt then Vmeasurment = 100 (1K / 100K) = 1000 mV.
DVM Resolution = (1.1 / 1023) 100 Volt = 107.52 mV.
1000 Volt Scale
0 to 1000 Volt measurement voltage is fed to A0 analog input, through potential divider (R19 : R7+R8+R5) (1K and (9K+90K+900K)).
If Vin is 1000 Volt then Vmeasurment = 1000 (1K / 1000K) = 1000 mV.
DVM Resolution = (1.1 / 1023) 1000 Volt = 1075.2 mV. = 1.075 Volt
Step 2: Software
The Arduino LiquidCrystal library is used for displaying the measured voltage at 16x2 LCD.The 1.1V internal reference is chosen for the ADC.
The voltage divider will, provide the input voltage between 0 to 1100mV.
Hence the software will measure and display the values between 00.00 Volt to 1000.00 Volt, in accordance with the Scale selection.
Sine 4 way 2 pole rotary switch is used, the Scale selection and voltage divider selection happens in parallel.
Initially the software will display the “DC Volt meter” for about one second.
If over voltage is fed, the software will display the over voltage indication too (> 1 mVolt, > 10 Volt, > 100 Volt, > 1000 Volt).
10 bit ADC reading is mapped to 1100 mV, which is the Vref mille volt.
Every 500 mSec the ADC is polled and displays the new reading.
gizlenmis kod
Step 3: Conclusion


The measured DC voltage is displayed 16x2 LCD display.
Below illustration will demonstrate the accuracy and measured values.
https://kulogluelektronik.blogspot.com


No comments:
Post a Comment